


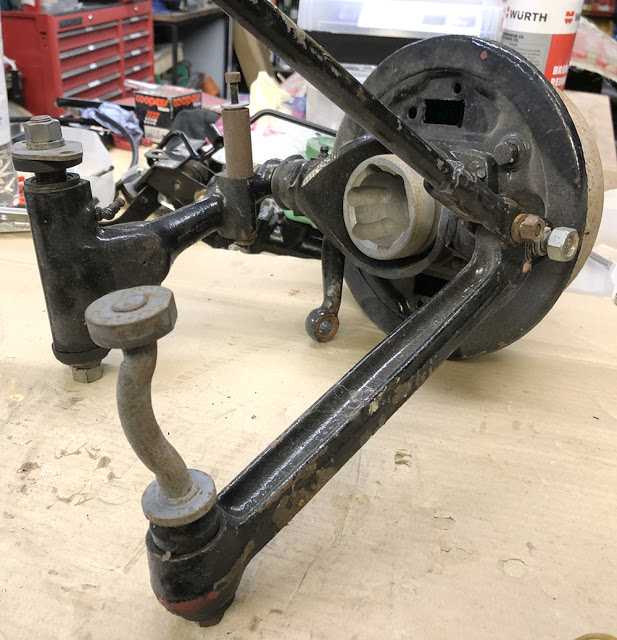
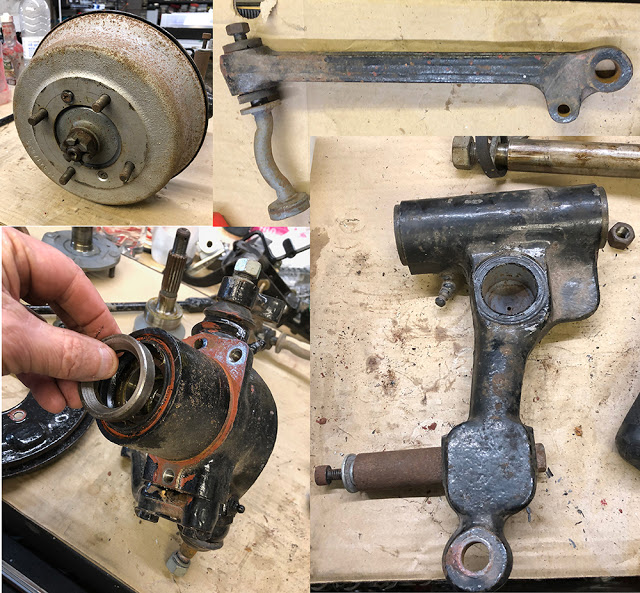
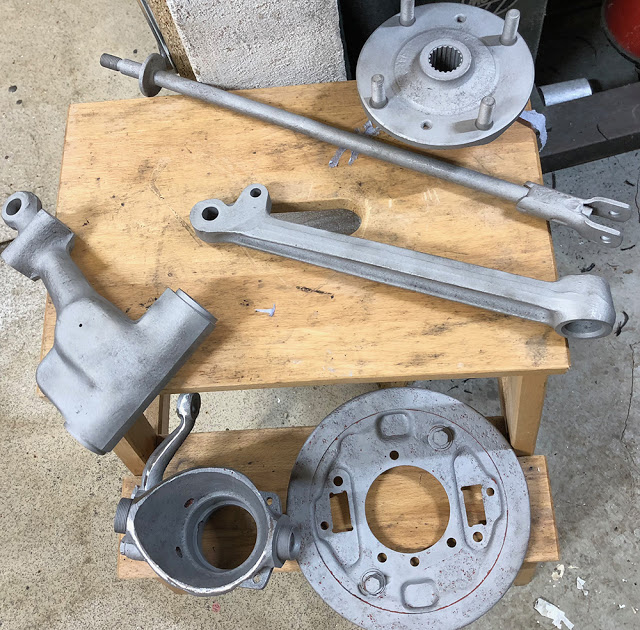
The front suspension on this Berkeley is from a Mk1 Mini - as is the subframe. Although it has been pre-assembled, it looks remarkably original and un-messed-with. The rubbers have all seen better days and the bearings and seals feel tired but it's all rust-free and seems perfectly usable. That said - I've never owned nor can I recall even working on a Mini so this is all new to me.
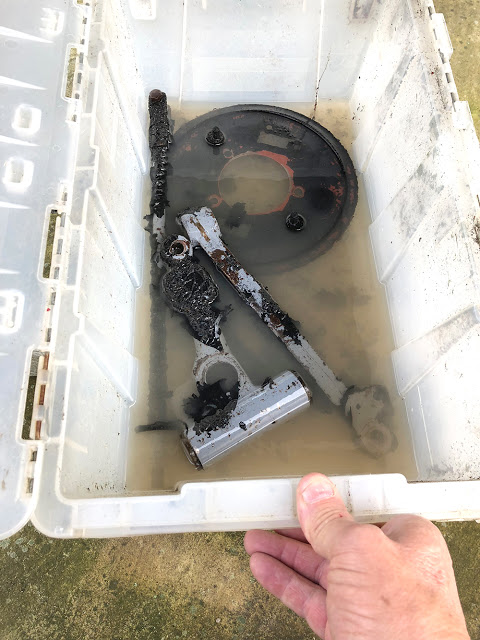
First thing to do is strip it and dip the painted parts in a bath of Gun Wash thinners to strip off the old paint. There's about half a gallon in this plastic storage box. It's enough to cover these parts and I can close the lids to minimise evaporation and leave it outside under cover.
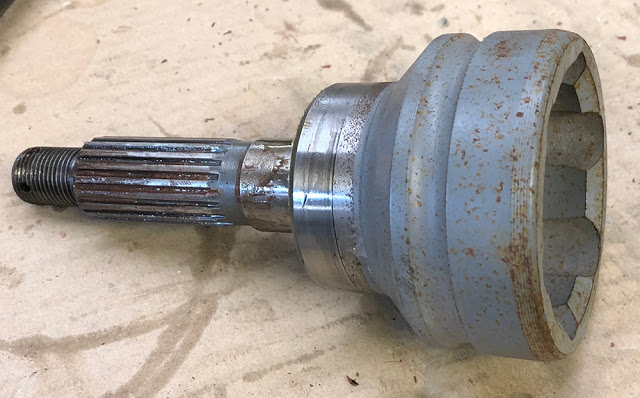
The Mini was, of course, a front wheel drive car with driveshafts and CV joints. But we're driving just the single rear wheel on the Berkeley so the 'cup' end of this stub axle is unused and just excess weight.
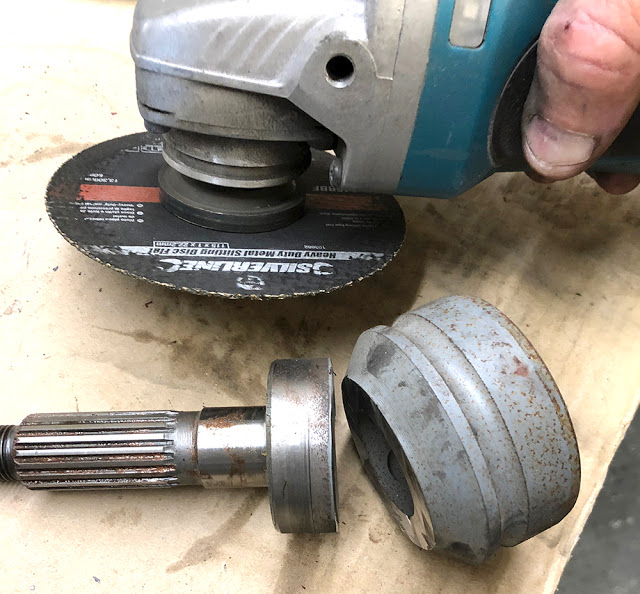
It's surprising how quickly a 1mm thick cutting disc on my Makita 18 Volt angle grinder can cut through this hefty chunk of toughened steel - cleanly too.
It's all in pretty good condition for it's 50+ years but it's been treated to some dodgy paint which will all have to come off. Perhaps surprisingly, all these parts and spares for them are readily available and inexpensive so it makes sense to recondition it all anyway. I'm going to do one side at a time. The rusty stand-off pillar in the bottom right picture is a new mount for a smaller shock absorber. The top shock mount is welded on to the subframe turret.
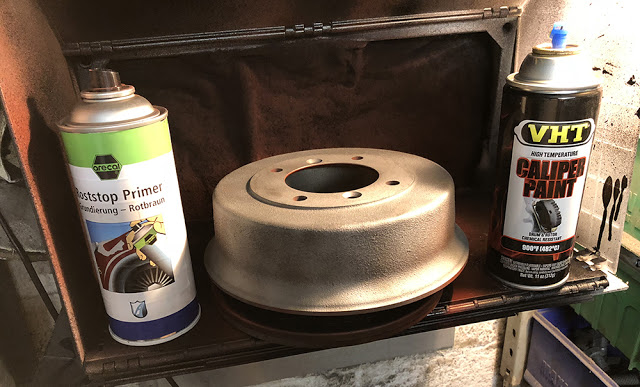
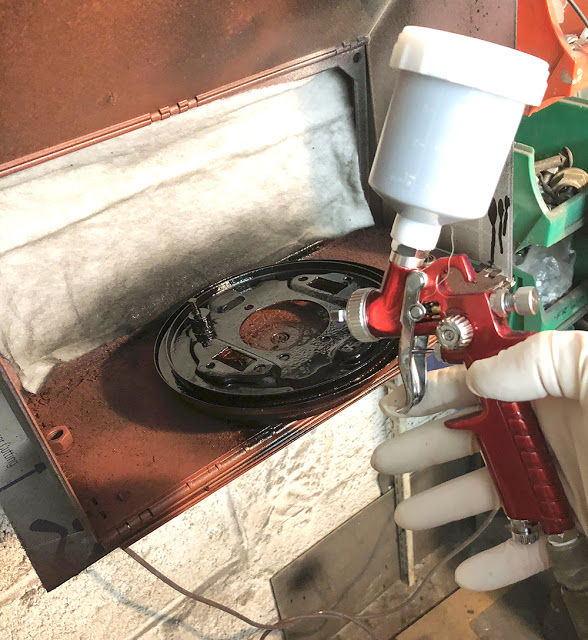
Everything gets a grit-blasting in our large booth before masking and painting. I'm using our brilliant little CBS Paint Booth for a coat of Red Oxide Primer then two or three coats of VHT Gloss Black Caliper Paint - both aerosols. I regularly replace the filter element in the booth with some 'Cooker Hood' filter sheet bought from ebay for a couple of quid.
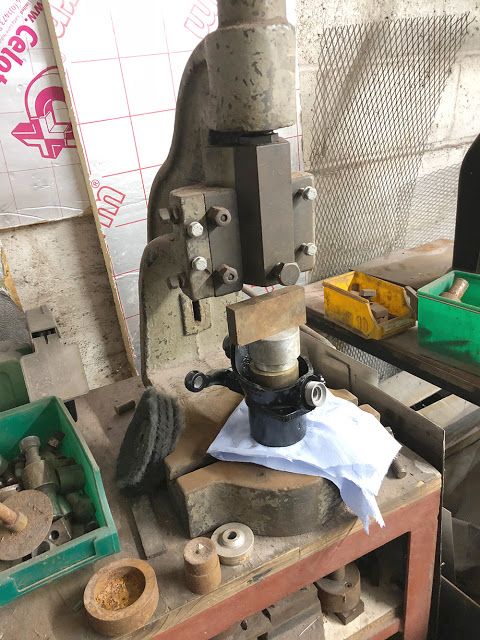
A few years ago, when UK engineering firms were collapsing at a frightening rate, you could find fly presses in their scrap skips or buy them for their scrap metal value. We have three in our workshop and they still come in handy now and again. I'm fitting new bearings here.
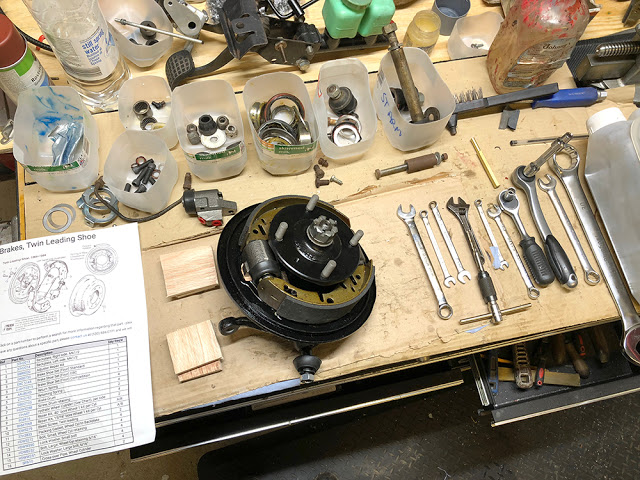
Assembly time with new cylinders and shoes. It's all pretty basic but Google and YouTube are brilliant sources of information to make sure I get the orientation of all the parts correct and don't do anything silly. All the components, old and new, have their own cut-down milk carton storage tub on my bench top.
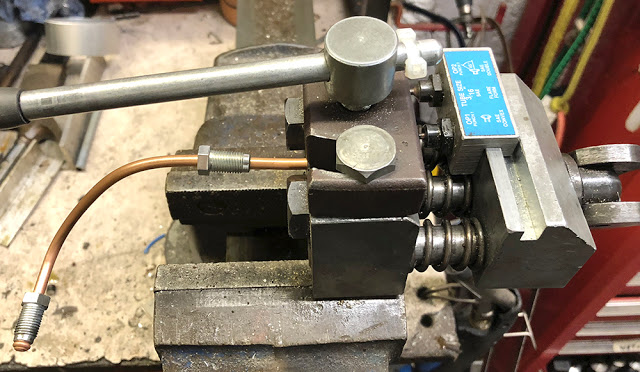
CBS have in stock several pipe flaring tools - some hand-held and some bench-top. This one is our 'Professional Pipe Flaring Tool' Part No: #PROFLARE. Here it's fitted with tools for 3/16" pipe but all other size tooling is available. I'm making the copper link pipe for the front master cylinders.
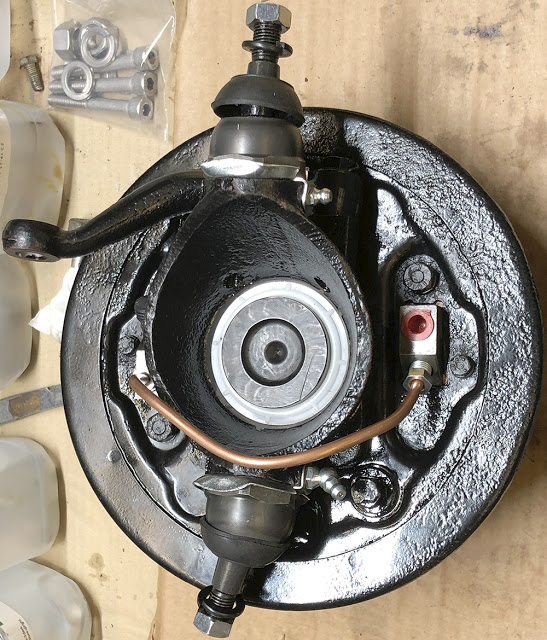
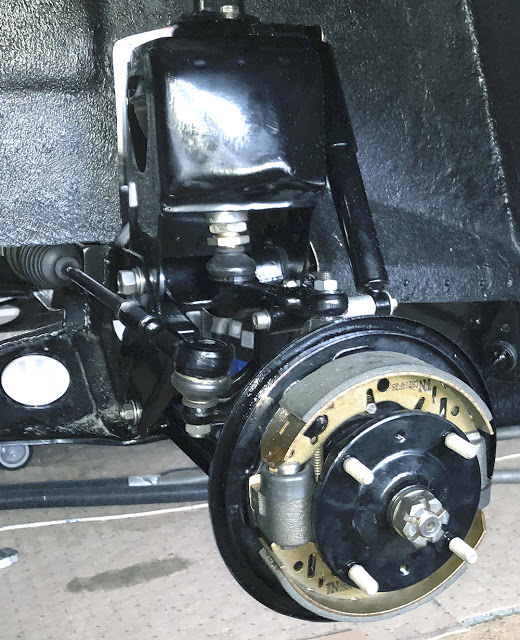
New Ball Joints, new cylinders, new bearings, new shoes and even new grease nipples. I've painted the cut end of the stub axle where the CV cup was. Looks quite neat.
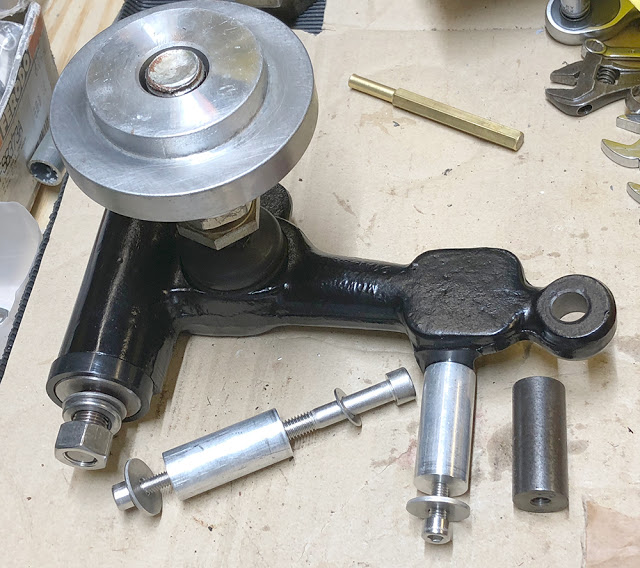
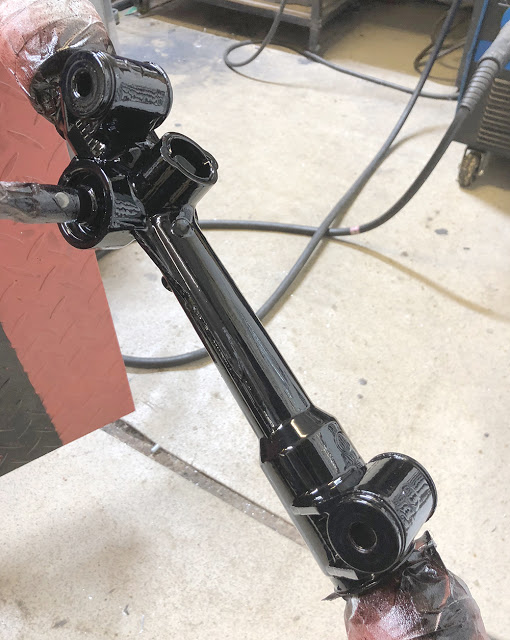
The lower arm all finished with new needle rollers and shaft with stainless nuts and washers. I've made aluminium stand-offs for the lower shock mount to replace the rusty steel ones (bottom right). The aluminium cone is a replacement part that allows ride height adjustment which could be handy because, although the geometry is pretty standard the vehicle's weight and suspension loading is much less than the original Mini.
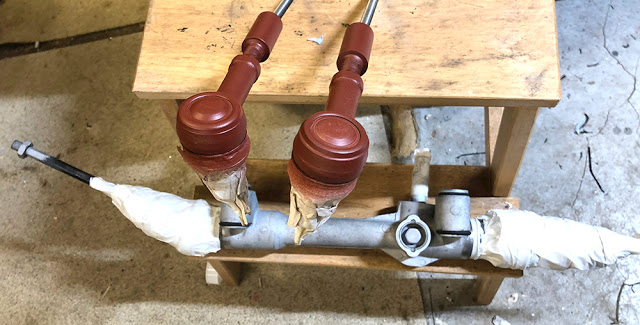
The rack and steering column are from a Fiat Cinquecento. The ball joints are new and the rack feels in good order. I've masked and blasted it all ready for Red Oxide and Black paint. The front track width of the Berk is slightly wider than the Cinquecento so these 'track rod extenders', screwed into the track rod ends will widen it by about 25mm each side.
Here are the freshly-blasted offside suspension parts. They will have a coat of Red Oxide aerosol primer but for demonstration and comparison I'll use a different sort of paint for the top coat.
These are the component parts of 2-pack paint (usually called 2K) I bought 1.5 litres of gloss black on ebay for £23. That's a one litre can of colour base coat, half a litre of hardener plus a gallon of thinners. I also bought some measuring cups, but for small quantity mixes, I find the scales easier. 2-pack was once the paint of choice for body shops and even manufacturers but it is Cyanoacrylate-based and very hazardous to use without the right equipment. It's still available for hobby use and small body shops but water-based, oven cured paints are the legal norm for big users these days. It's important to have effective extraction and at least a Carbon Filter breathing mask but the benefits of two-pack can vastly outweigh the downside. The paint is mixed 2:1 with the hardener and 10% thinners is required so there's a high proportion of solids and coverage is excellent. Also, because of its chemical curing two-pack is much tougher than other paints and more resistant to thinners and other solvents.

This small spray gun cost about £15 at a recent show - amazing value for money. It has all the design features of guns costing many times the price and works brilliantly on these small components. It's pretty cold outside this January so I have my Kerosene heater on in the workshop and warm up the components before painting in my little CBS spray booth.
This is the Fiat rack and the finish is superb.
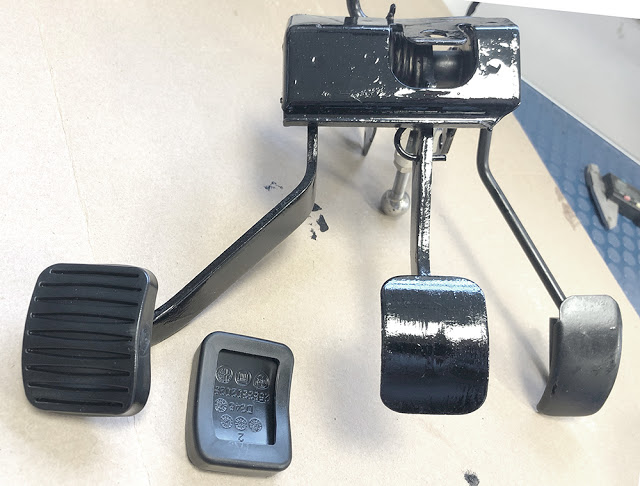
A couple of new rubbers from ebay smartens-up the pedals.
Here's the off-side suspension - back together and looking smart with stainless fasteners where appropriate. I've used our POR15 Bed Liner Coating on the inner wings and stippled it with a brush as it was drying. Very smart.
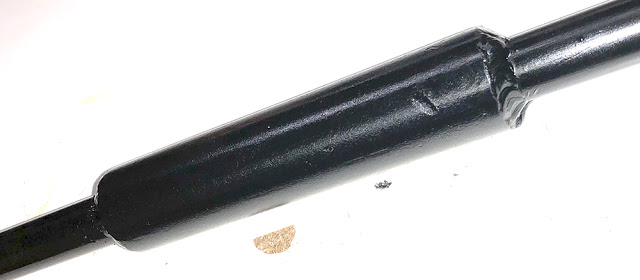
The Fiat lower steering column was too short for the Berkeley installation so it was extended by 100mm or so with a strong welded sleeve.

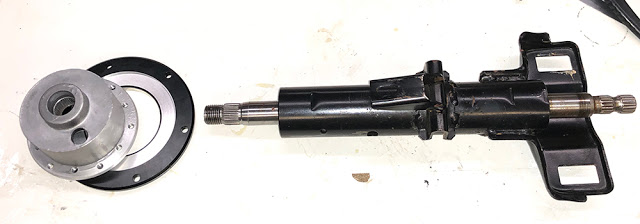
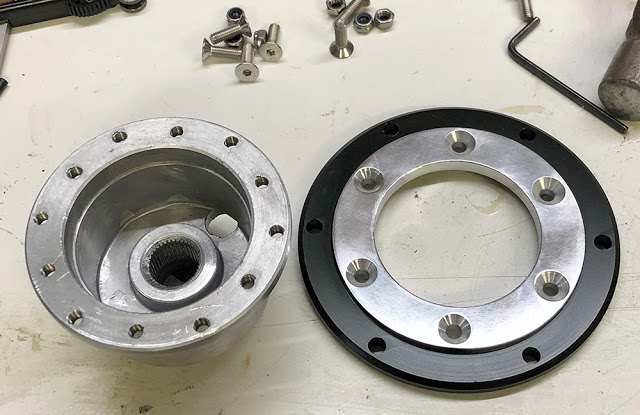
The upper column is OK as standard but we have to mount a steering wheel to it. On the left is a bare, cast aluminium steering wheel hub and a modified CBS #SSADAPT1 adapter plate. You can see that I have machined out the centre of the #SSADAPT1 and made a shallow counterbore to locate the hub flange. Read on to see how to do it.
You could make a simple adapter plate from a disc of 3mm or 4mm aluminium, jig-saw'd from a sheet and drilled by hand, but if you have a lathe or know someone who does, it's a fairly simple turning job to modify our #SSADAPT1.
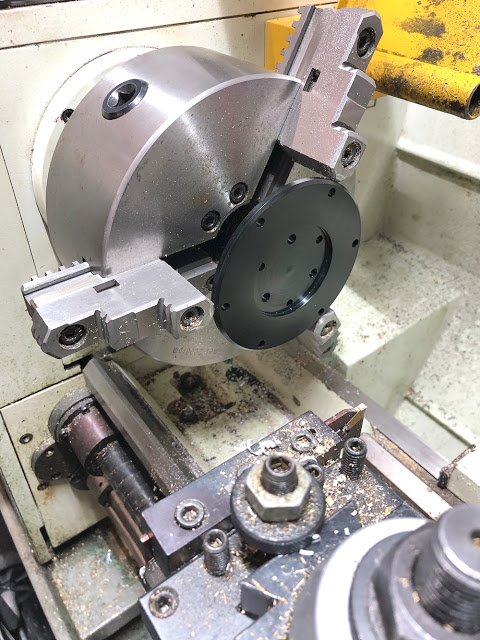
Here, on the right is the bored-out #SSADAPT1. The adapter plates are supplied with a black anodised finish, which I have removed from the exposed face with 400 grit Wet & Dry then polished the bare aluminium. The hub, on the left has two sets of six M5 tapped holes. SIx on a 70mm PCD and six on a 74mm PCD. I clamped the adapter plate concentric to the hub and spot drilled through the six, 74mm PCD holes. I then drilled and countersunk holes through the plate to mount it to the hub with M5 countersunk stainless screws.
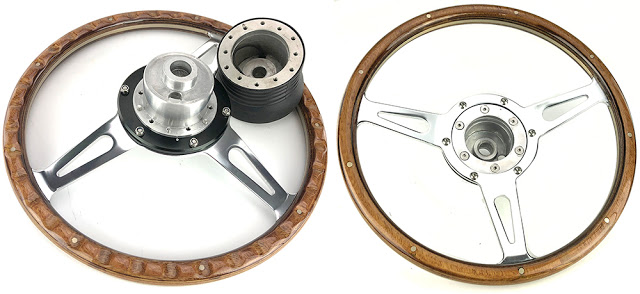
This picture shows our #WRSW13, Wood Rim Steering Wheel mounted on the adapter plate which is mounted on the boss. You can see here a similar boss as supplied, with it's plastic shroud and slip ring horn connection - both of which can be removed. I'll have a simple horn push button on the dash and I'll sort out a suitable centre for the wheel later.
Seems like a good time to line the engine bay with our 'Heatmat'. Heatmat (part number #HTMAT) is a 1.5mm thick, woven ceramic cloth with an aluminium skin that has several functions. The cloth acts as an insulating barrier whilst the aluminium reflects heat. Heatmat also has a damping effect on large panels, reducing drumming and sound transmission. It also looks quite smart.
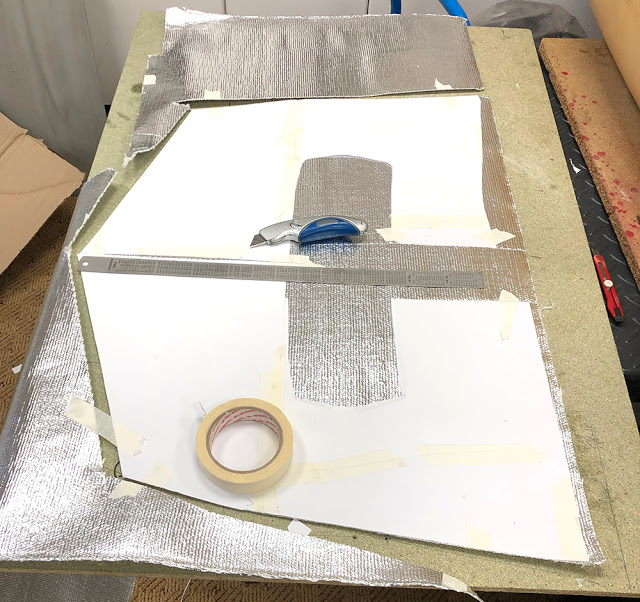
First step is to make templates. I use A3 sheets of heavy paper, cut and taped together. The more accurate you make your templates the neater the end job.
Here are the three templates - left and right inner wings and pedal bulkhead.
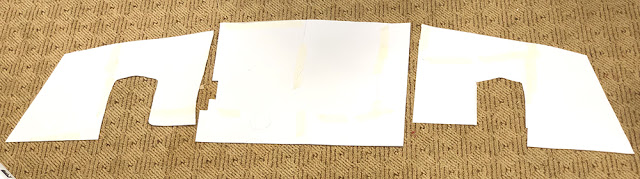
I taped the templates to the Heatmat making sure that the weave 'grain' of the fabric runs in the same direction for all panels. A sharp knife and straight edge make a neat job of cutting the shape.
Our #ADHCON is a high temperature contact adhesive that is ideal for gluing Heatmat to engine bays. The Heatmat must first be primed with a well-rubbed-in coat of adhesive. Let it dry completely.
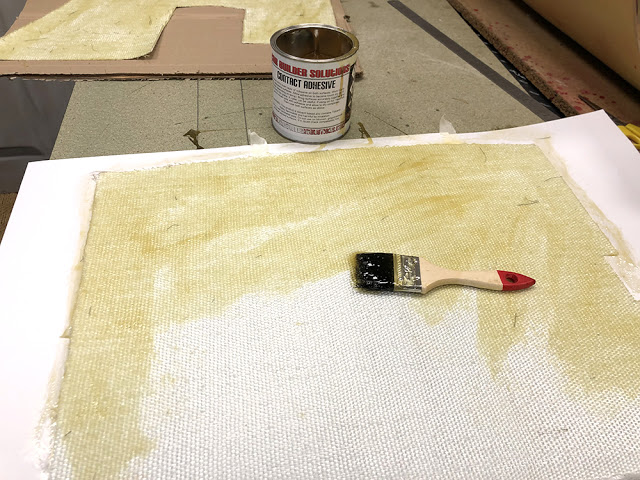
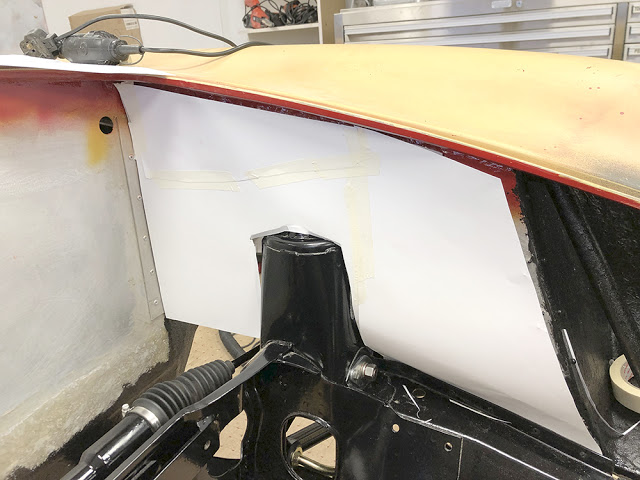
Here you can see that I've masked nearby subframe areas before brushing adhesive directly onto the panel. The Heatmat must also have another coat of adhesive and both left to 'touch dry' for an hour or so before applying to the panel. The pedal bulkhead is finished here.

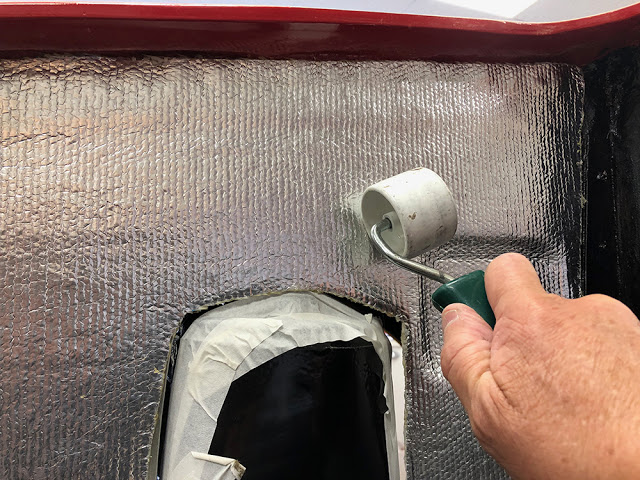
Take great care to position the Heatmat accurately on the panel before using a wallpaper roller to press it firmly in place. Heatmat will form around gentle curves as you can see on the shallow depression in the aluminium panel behind the roller.
I sorted out the bonnet hinges in a previous post, so while the engine bay is empty and the car is up in the air it's the ideal time to fit a bonnet stay and bonnet latch.
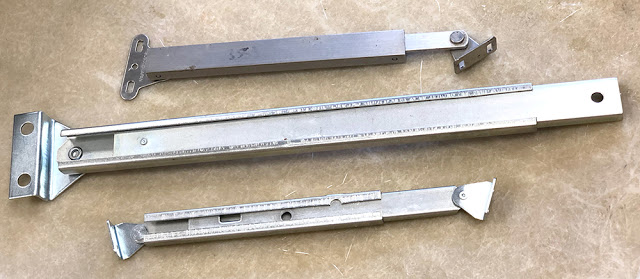
CBS stock a small and large bonnet stay - the bottom two in this picture. They both offer strong, one-handed operation with a fixed, maximum length and a mechanical, automatic-releasing latch. Heavy bonnets may need one, or maybe two of the large ones but the small, lightweight Berkeley bonnet only needs one small one. The brushed stainless one at the top of the picture has been in a drawer in our workshop for almost twenty years - just waiting for the right job - and this is it.
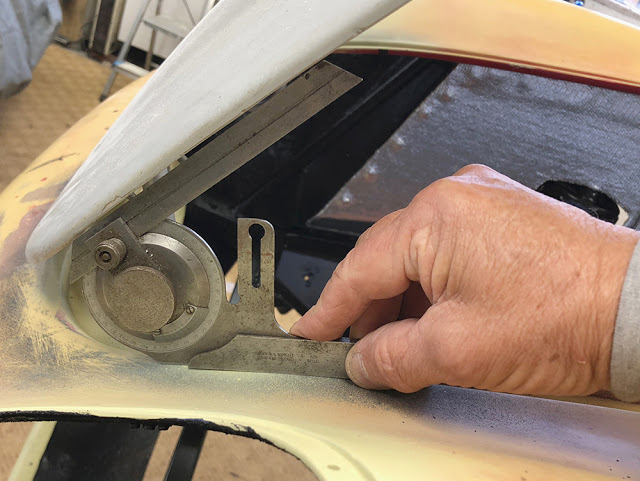
The way the bonnet now works with it's hidden hinges means that it has a maximum opening angle before the lower bonnet edge rubs on the nose area, so it's important to measure the angle accurately and mount the bonnet stay so that it limits the bonnet opening to that angle. I'm using a vernier protractor here but any angle finder should be good enough. I've propped the bonnet open at the maximum angle with a piece of wood. Note that both the bonnet and it's surround are slightly curved so I'm holding the lower edge of the protractor tangentially on the curved surface and I've set the upper edge to touch the bonnet at both ends.
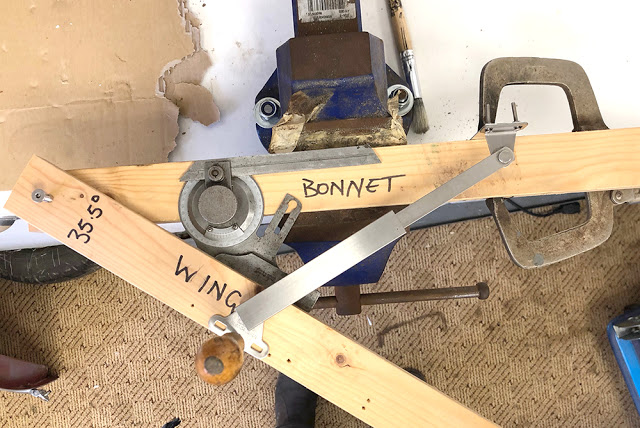
Ideally, the bonnet stay should be at its maximum length when the bonnet is open and at its minimum length when the bonnet is closed. It is of course possible to calculate the mounting position of each end geometrically, but I'd rather mock it up on the bench where I can see it all happening before my very eyes. I cut two pieces of wood to represent the bonnet and its surround on the inner wing. I measured the centre of rotation of the hinge and pivoted the two pieces on an M5 bolt.
Now the maximum opening angle is 35.5 degrees. This must be at the maximum length of the stay. The stay's release mechanism will give an 'at rest' position of a couple of degrees less than that.
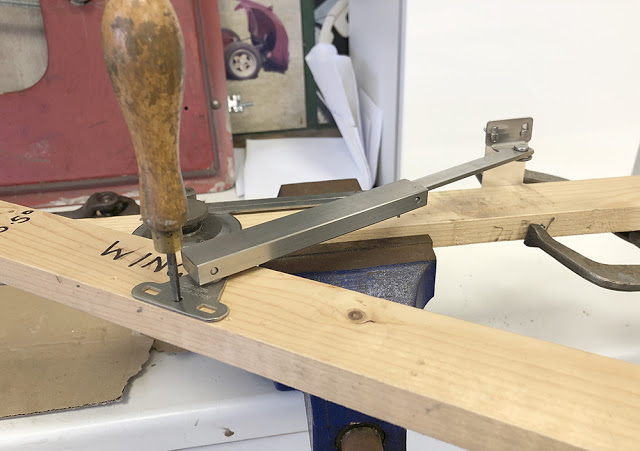
I've held one piece of the wood in my bench vice and bolted a simple plate to the top end of the stay so I can clamp it to the wood with a welding clamp. I've temporarily fixed the bottom end with a simple bradawl pushed into the wood (I still have to stop the lower mount from rotating when I test the mechanism but it's good enough for now). Bear in mind where the final mounting points will be on the car when you're moving the stay. When you've found the optimum position of the upper and lower mounting points take accurate measurements and transfer the dimensions to the car.
... and here it is mounted at both ends. I've just drilled straight through the bonnet and fixed it with M 4 screws. I can fill the holes later. At the bottom I've made a stainless angle bracket and bolted it to the underside of the bonnet reveal with M5 countersunk screws.
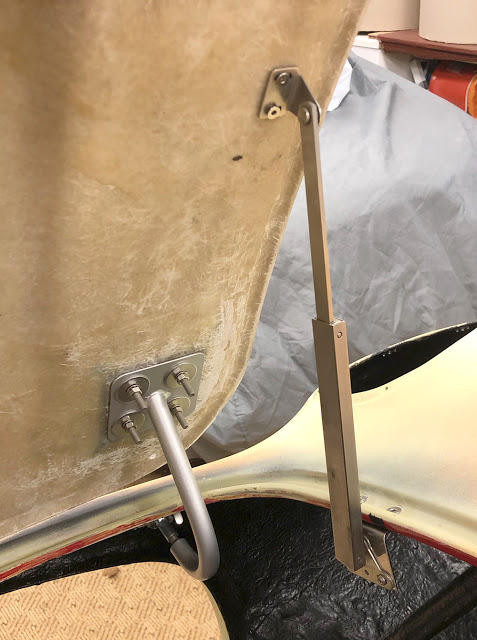
Here's the stainless bracket from underneath. I'll eventually sandwich a blob of filler between the bracket and the underside of the reveal to level-out and reinforce the mounting surface.
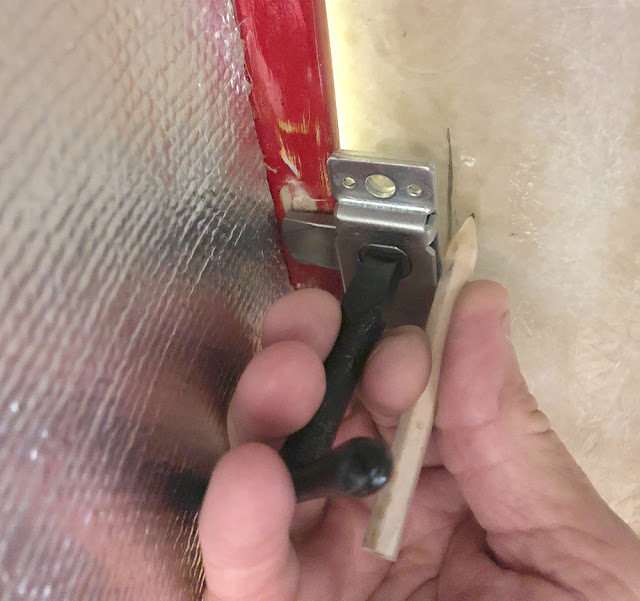
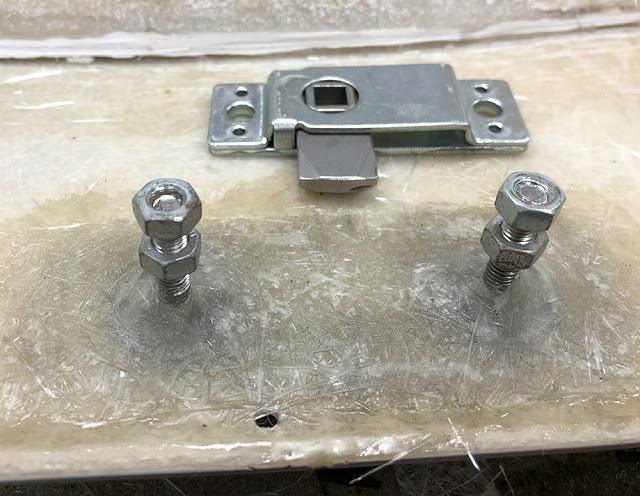
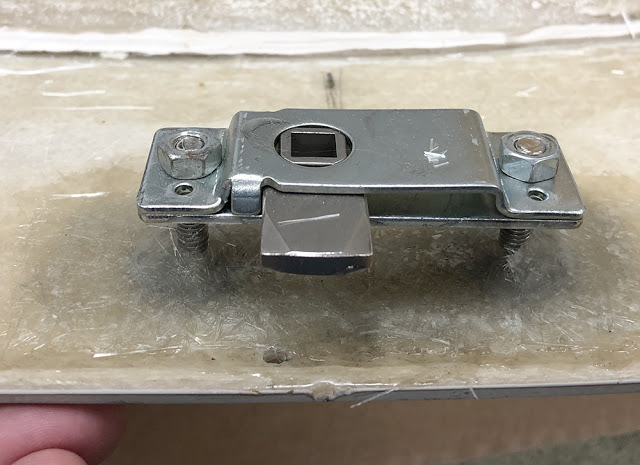
I decided to use a CBS #CABLAT Cabinet Latch to hold the bonnet down. I can see little point in having a locking bonnet latch on this car so this simple latch with a square key to open it through a hole from the top is the simplest and most elegant solution. While the bonnet was still fitted I offered-up the latch and marked its position on the inside of the bonnet.
Back to the bonnet stay. I decided to use M4 'Big Head' fixings for the top mount. 'Big Heads' are drilled, stainless discs with a welded-on stud. They are bonded to a (usually fibreglass) surface with matting and resin to form a strong, load-spreading mounting point for smaller components. You can see that I've ground away a little of each so they won't overlap when fitted to the holes in the bracket. I've cleaned and abraded the GRP surface and marked the position of the Big Heads with magic marker. This piece of chopped-strand mat is the first layer and will be bonded directly to the bonnet.
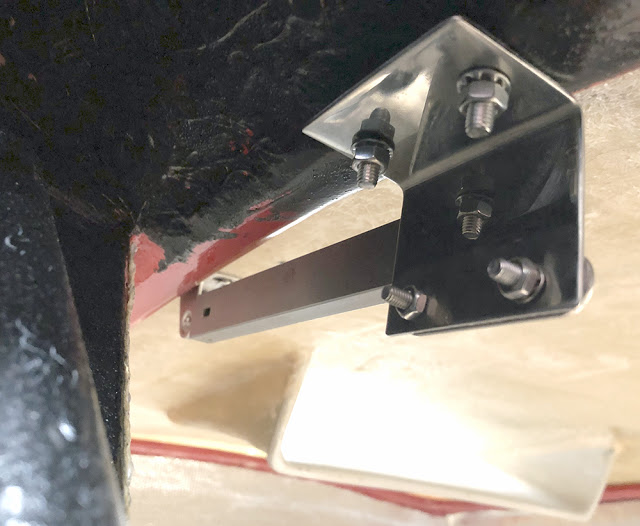
Here's the two M4 Big Heads bonded-in, with one layer of GRP beneath them and three layers on top - and the top mounting bracket of the bonnet stay. You see the guide marks through the wet resin. It's almost impossible to not get resin on the threads. I'll just run an M4 die down them later to clean them up.

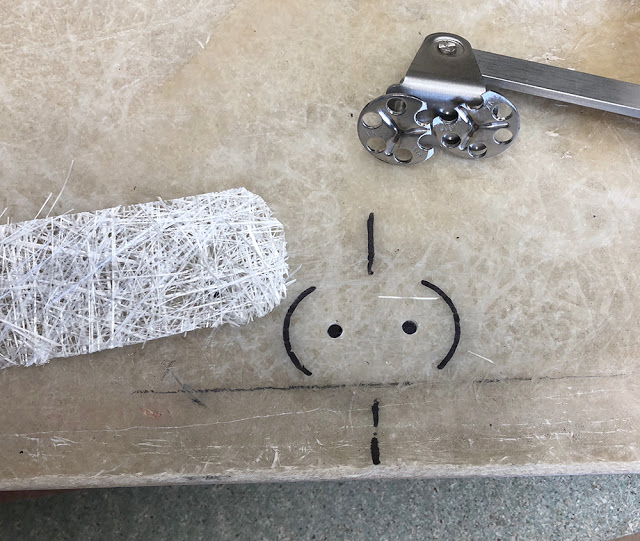
The Cabinet Latch with M6 Big Heads ready to be glassed onto the first layer of mat. I've scratched some lines into the bonnet as a positioning guide. I'll drill a hole through for the square key later. The small hole here was used to line-up the bonnet when I was fitting the hinges. It'll be filled.
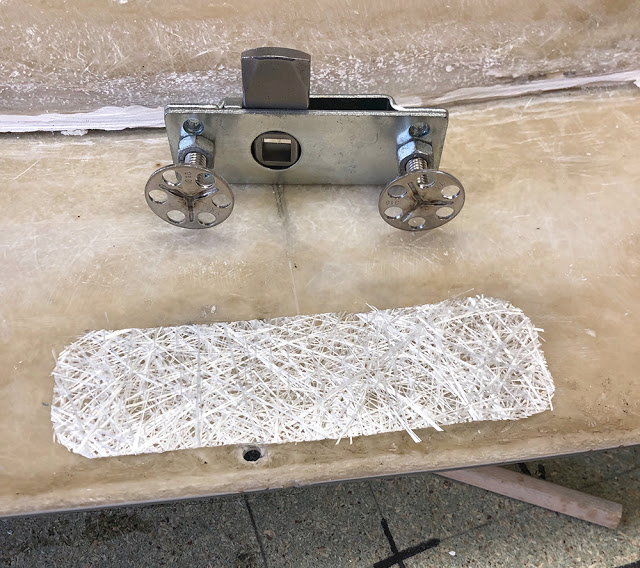
The Cabinet Latch will mount between the nuts on these two M6 Big Heads. It can then be adjusted up and down to adjust the bonnet fit. I'll replace them later with Nyloc nuts.
Voila
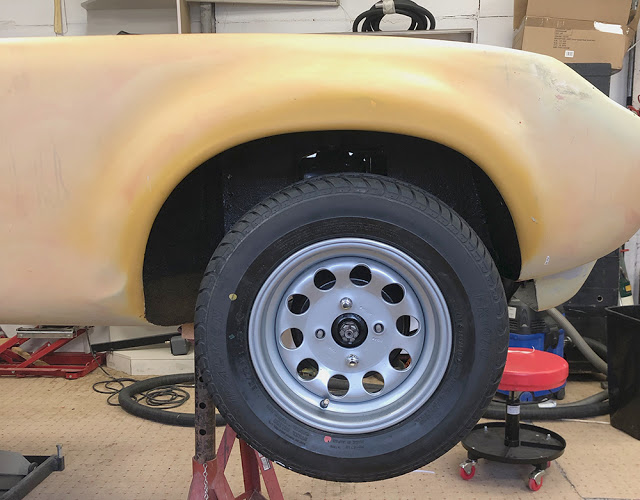
After much thought and research I finally opted for these 5J Weller Steel Pepperpot wheels. The only colour choice was white so I sent them to the powder-coaters for blasting and powder coating in Rosso-Corsa Red. Unfortunately that was unsuccessful - they came back fluorescent orange with a crap finish. So, I took them to Kent Custom Dipping in Laddingford - but this time, chose this Silver finish. They did a superb job.
That'll do for this post. Sorry it's been a long time 'a comin' but work has to take priority over Toys. Hopefully I'll be able to find some more time to get cracking on the engine installation soon and we'll be able to bring it along to shows and give the NORVIN a rest. Ciao for now.